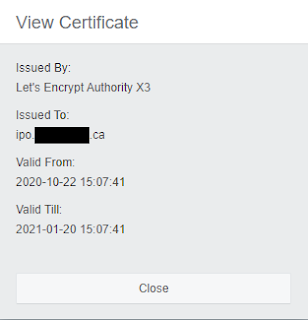
The IP Office generates a self-signed certificate for the purpose of presenting its identity. Any Avaya elements will trust this certificate, but modern web browsers will not by default. One option we have is to add the Avaya Certificate Authority to our list of trusted issuers, but a better way is to ensure that the IP Office presents a certificate that is universally trusted. The Electronic Frontier Foundation (EFF) is providing free publicly trusted certificates with a three month expiration. The short duration is intentional - any malicious use of the certificates wouldn't last longer than three months, making the Internet a safer place.
The EFF has a utility called CertBot that can be used to generate these certificates on your local machine. They use Public DNS to validate that the correct machine is requesting the certificate. The whole process takes only a few minutes, and when run on a web server can automatically apply the certificates to the hosted pages.Unfortunately Avaya has not yet integrated CertBot functionality into their finished product, so we will need to manually create a certificate, extract the portion that the IP Office needs, and apply the certificate. This will need to be done on a regular basis because of the short certificate duration. Please reach out to your Avaya partner or account manager and ask them to add CertBot integration to the IP Office in future releases! As more people request this functionality Avaya becomes more likely to include it in a future software release. You can download CertBot here. We can't install CertBot directly on the IP Office, so a Linux PC or server will be required. Once CertBot is installed on your Linux PC or Server we can proceed with generating a new certificate.
The next step is to use CertBot to create a certificate. For the purpose of this example I will redact all my screenshots, hiding the actual FQDN I used. For reference I will use the domain ipo.adventuresinvoip.ca in all of the commands. Simply change out the FQDN for the FQDN you want to assign to your IP Office. Since the CertBot utility uses DNS records you need to be sure to have a DNS A Record for the FQDN you are using. This should point to the public IP Address of the router that the Linux machine is connected to. You will need to enable port forwarding for Port 80 to the Linux machine to get CertBot to work properly since it checks for an HTTP request/response.
My Linux machine already has a web server running, so I chose to leverage that for the generation of the certificate. To generate the certificate I ran the following command:
certbot run --domains ipo.example.ca
If you don't have a web server running on your Linux machine you can run the commmand in Certificate Only mode:
certbot certonly --domains ipo.example.ca
Once the certificate chain has been created you may be prompted to install it on your web server - since we aren't generating the certificate for this machine we should not be applying it to this server.
Now we have a new certificate. It will be located in the CertBot folder under a subfolder for that FQDN. In our example this full path would be:
/etc/letsencrypt/live/ipo.example.ca/
The IP Office is unable to use the certificate in this format so we will need to convert it. Change to the folder containing the certificate and extract the PKCS#12 Certificate from the full chain with these commands:
cd /etc/letsencrypt/live/ipo.example.ca/
openssl pkcs12 -export -in fullchain.pem -inkey privkey.pem -out ipo.p12 -CAfile chain.pem
The second line will prompt for an export password. This password will be used to add the certificate back to the IP Office. Once complete the file ipo.p12 will be created. We can apply this certificate to the IP Office. Copy the ipo.p12 file back to your local PC and launch a web browser. The certificate is easiest to apply using Web Manager, so that's the method I will cover here.
Log in to Web Manger using the Administrator account (other accounts can be used as long as the permissions allow the manipulation of certificates). Select Security from the top menu, then Certificates.
This will take you to the Certificates portion of IP Office Web Manager. Here you will see a list of all the trusted certificate authorities, as well as some options to manipulate the IP Office certificate.


No comments:
Post a Comment